So... I was asked to do some crayon art, involving hearts. I have previously done the big crayon art on the canvas and it turned out OK, so I thought I would give this one a shot... Well... it didn't turn out as cute as I had in my head, but the kids loved doing it and they like how it turned out... so that's all that matters. I forgot to mention that this is part of their teacher gifts for V-day. :)
I started with a blank canvas and some chopped up crayons...
Then I hot glued them, and started the blow dryer. I used low heat on hot . It takes a few minutes to get the crayons going, but once you do, it starts melting like this:
And then it turned out like this: (Not SUPER cute, but hey... it's kids art and it's the thought that counts, riiiggghht??) ;)
This space is intended to be all things Britney. :) I am passionate about DIY-ing, crafting, photography, and my family and health. I love to share new ideas, recipes and fashion. Thanks for stopping by and I hope you find something that inspires you. XO
Showing posts with label decor. Show all posts
Showing posts with label decor. Show all posts
Wednesday, February 8, 2012
Future Ideas :)
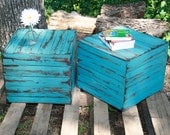
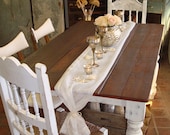
I cannot WAIT until spring. I want to be outdoors working on the house, and the yard and re-doing furniture in warm sunny weather. WHERE oh where is spring?? I came across a couple of ideas that I'm playing around with in my head for future inspiration, and honestly I think they're going to turn out sooo cute. Here are a couple, and I will continue to add to the list as they come.... :)

http://img2.etsystatic.com/il_170x135.266363394.jpg

http://img2.etsystatic.com/il_170x135.287735658.jpg
Labels:
architecture,
art,
before and after,
crafting,
crafts,
decor,
decorative,
DIY,
furniture,
home,
home decor,
homemade,
paint,
remodel,
shabby
Sunday, February 5, 2012
Up-Cycled
So I have been super busy with some "up-cycling" in my house. Some of those projects have included updating my daughters room. Here's some of the "almost finished" pictures... My mother in-law is working on some new shabby bedding for her, and I would love to find her a chandelier and maybe a vintage vanity still...
Before I got to this point I had to start with plain white walls, nail holes EVERYWHERE and boring furniture. The nightstand and headboard you see pictured above used to be HIDEOUS, but I bought both for $16 so I'm not complaining. :) This is where I sort of started:
I got some free wallpaper sample books from my local paint store, and Aydan and I picked out the ones that we liked. I just pasted them on the wall with wallpaper paste... As you can see above, her dresser used to be white. :)
I sanded the previously hideous headboard above, then primed it. I bought one of those wood embellishments from Lowe's for $3, glued it on and then painted the whole thing a very shabby greenish color. I sealed with poly and voila. :) I have to say that none of her furniture matched at all, or even came close to coming from the same place... but now it definitely feels unified.
With her dresser I did the same as above, but I lined the drawers with some textured wallpaper and I changed out some of the hardware. The other hardware I simply painted green like the rest of the dresser. :)
This HAS to be my FAVORITE piece of all. I just LOVE the nightstand. I bought this piece for $6 at a local thrift store... and I must say, I really turned it out. :) It was solid wood, but it was dark and rustic and pretty worn out. I should have taken before pictures and I definitely learned my lesson... I was just sooo excited to start it. :) I painted it just like the other furniture, but I pasted and sealed a piece of wallpaper that also matches Aydan's wall on the top. I think it turned out perfectly. You guys will have to let me know what you think of it. :)
We added some accessories, but I wanted to keep her room very simple still. Before as you can tell she just had SOOO much. My kids definitely don't go without... but we had too much going on. Now it's simple, sophisticated and something we can continue to work on as she grows. I think it's coming along really well. The "A" pictured above she actually painted as a little-little girl and last weekend we glued glass beads on all the letters to spell her name. It now resides above her closet, but looks adorable and she had a blast making. The lamp is from one of my previous posts, but you can finally see it in action. :) I hope you enjoyed seeing some of my new stuff, and maybe it even inspired you a little?? ;) I hope so anyway. XO
Labels:
art,
bedroom,
before and after,
chandelier,
children's art,
crafting,
crafts,
decor,
DIY,
frames,
furniture,
girls rooms,
home,
home decor,
inspiration,
lamp shades,
lamps,
ruffles,
shabby,
shabby chic
Monday, January 23, 2012
New Found Inspiration
Recently I've been looking at re-doing my daughters room. Well, every room really but with my budget I've gotta go one at a time... Ha. I'm thinking very shabby. Here's some things I've come across that I'm considering, what do you think?
Wednesday, January 18, 2012
I Need This!! :)
Instant space in your kitchen! I want a white one of course, so I can add moulding, change the knobs and add a thick butcher block top... Photo is from the January HGTV magazine. What do you guys think? It'd look awesome in my kitchen right?? ;)
Sunday, January 15, 2012
Lamp Shade DIY
So I previously posted the lamp shade from mama says sew's blog... And I finally got around to re-doing the lamp shade for my daughters room. :) This was the $1 lamp I had picked up from the thrift store, and I wish I had taken before-before pics because it was a HIDEOUS brass color before. All I did was spray paint the base, and I used a shade that I already had. I picked up about 1.5 yards of burlap and used my hot glue gun... it was MUCH messier than I had anticipated, but I'm thrilled with the results! I followed "mama's" instructions with a few exceptions and I think I made mine slightly fuller. But it was a great tutorial and I hope if some of you attempt this you'll let me know how it turns out :)
 |
| Final Product :) |
 |
| After |
 |
| Before |
Thursday, January 12, 2012
One of my DIY projects :)
So I originally got this idea from pinterest, and fell in love!! This whole project cost us $16 and we're loving it!! It's soo easy and honestly it turned out gorgeous! What do you think??
Subscribe to:
Posts (Atom)


