Showing posts with label crafts. Show all posts

Wednesday, February 8, 2012

Valentine's Crayon Art

So... I was asked to do some crayon art, involving hearts. I have previously done the big crayon art on the canvas and it turned out OK, so I thought I would give this one a shot... Well... it didn't turn out as cute as I had in my head, but the kids loved doing it and they like how it turned out... so that's all that matters. I forgot to mention that this is part of their teacher gifts for V-day. :)
I started with a blank canvas and some chopped up crayons...

Then I hot glued them, and started the blow dryer. I used low heat on hot . It takes a few minutes to get the crayons going, but once you do, it starts melting like this:
And then it turned out like this: (Not SUPER cute, but hey... it's kids art and it's the thought that counts, riiiggghht??) ;)


Future Ideas :)


I cannot WAIT until spring. I want to be outdoors working on the house, and the yard and re-doing furniture in warm sunny weather. WHERE oh where is spring?? I came across a couple of ideas that I'm playing around with in my head for future inspiration, and honestly I think they're going to turn out sooo cute. Here are a couple, and I will continue to add to the list as they come.... :)
SALE Custom End Side Table set of 2 salvaged barn wood stands in Serenity blue (42 COLORS)
http://img2.etsystatic.com/il_170x135.266363394.jpg
Reclaimed White Farm Table, Rustic Barn Pine Farmhouse, Dining Table
http://img2.etsystatic.com/il_170x135.287735658.jpg

Sunday, February 5, 2012

Up-Cycled

So I have been super busy with some "up-cycling" in my house. Some of those projects have included updating my daughters room. Here's some of the "almost finished" pictures... My mother in-law is working on some new shabby bedding for her, and I would love to find her a chandelier and maybe a vintage vanity still... 


Before I got to this point I had to start with plain white walls, nail holes EVERYWHERE and boring furniture. The nightstand and headboard you see pictured above used to be HIDEOUS, but I bought both for $16 so I'm not complaining. :) This is where I sort of started:

I got some free wallpaper sample books from my local paint store, and Aydan and I picked out the ones that we liked. I just pasted them on the wall with wallpaper paste... As you can see above, her dresser used to be white. :)

I sanded the previously hideous headboard above, then primed it. I bought one of those wood embellishments from Lowe's for $3, glued it on and then painted the whole thing a very shabby greenish color. I sealed with poly and voila. :) I have to say that none of her furniture matched at all, or even came close to coming from the same place... but now it definitely feels unified.
With her dresser I did the same as above, but I lined the drawers with some textured wallpaper and I changed out some of the hardware. The other hardware I simply painted green like the rest of the dresser. :)

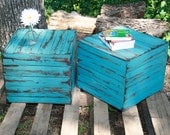
This HAS to be my FAVORITE piece of all. I just LOVE the nightstand. I bought this piece for $6 at a local thrift store... and I must say, I really turned it out. :) It was solid wood, but it was dark and rustic and pretty worn out. I should have taken before pictures and I definitely learned my lesson... I was just sooo excited to start it. :) I painted it just like the other furniture, but I pasted and sealed a piece of wallpaper that also matches Aydan's wall on the top. I think it turned out perfectly. You guys will have to let me know what you think of it. :)


We added some accessories, but I wanted to keep her room very simple still. Before as you can tell she just had SOOO much. My kids definitely don't go without... but we had too much going on. Now it's simple, sophisticated and something we can continue to work on as she grows. I think it's coming along really well. The "A" pictured above she actually painted as a little-little girl and last weekend we glued glass beads on all the letters to spell her name. It now resides above her closet, but looks adorable and she had a blast making. The lamp is from one of my previous posts, but you can finally see it in action. :) I hope you enjoyed seeing some of my new stuff, and maybe it even inspired you a little?? ;) I hope so anyway. XO

Friday, January 20, 2012

Kids Art

Soo... I'm one of those moms that save EVERYTHING! My kids are in pre-k and 1st grade and I already have 4 huge tubs filled with art work and meaningful things that I want to save. I'm literally over flowing with art in our house. I found a great way to save some of my favorite things the kids do in a cute way that's innovative, confidence boosting for the kids and just creative. We go to the dollar store, pick out frames for them to paint and then we frame our favorite things to hang in their rooms. This way they get to see what they've done, and really be proud of displaying it. :) it's fun and you can recycle pictures, or trade them out every so often... Whatever works for your home :) What are some things that you do at home with your children's saved items??

Monday, January 16, 2012

Flower Pots DIY

Super cute way to grow your herbs in the window sill, nurture a baby plant, or give away. :)
• paint a can, any can :)
• seal with poly... Or you'll get rust
• add some drainage holes with a drill bit
• decorate and plant something :)

Easy Simple Valentines Boxes

These are soooo easy and fun for the kids. For mine I modge-podged the foil on tissue boxes and then let the kids decorate the outsides with stickers and decals. :) Easy. Quick. Fun.

Sunday, January 15, 2012

Lamp Shade DIY

So I previously posted the lamp shade from mama says sew's blog... And I finally got around to re-doing the lamp shade for my daughters room. :) This was the $1 lamp I had picked up from the thrift store, and I wish I had taken before-before pics because it was a HIDEOUS brass color before. All I did was spray paint the base, and I used a shade that I already had. I picked up about 1.5 yards of burlap and used my hot glue gun... it was MUCH messier than I had anticipated, but I'm thrilled with the results! I followed "mama's" instructions with a few exceptions and I think I made mine slightly fuller. But it was a great tutorial and I hope if some of you attempt this you'll let me know how it turns out :)
Final Product :)
After
Before

Thursday, January 12, 2012

Teacher Gifting Ideas

Here are some gifts for teachers that I've done in the past and they're really easy and fun to do. :)